Microsoft has rolled out an exciting new feature that allows users to view key highlights of activities within Table record timelines, all powered by Generative AI. This feature is a game-changer for agents, enabling them to absorb crucial information efficiently and improving interactions with customers.
#How It Works:
The Timeline Highlights feature showcases relevant items in a clear, bulleted format, making analysis quick and reference easy. This not only speeds up decision-making but also fosters transparent interactions with customers.
#Where You’ll Find It:
You can access the Timeline Highlights feature in various apps, including Dynamics 365 Customer Service, Sales, Marketing, Field Service, and custom model-driven Power Apps. This ensures a seamless experience across the Dynamics 365 ecosystem.
#Enabling or Disabling Timeline Highlights:
Here is how you can enable or disable Timeline Highlights at the app level:
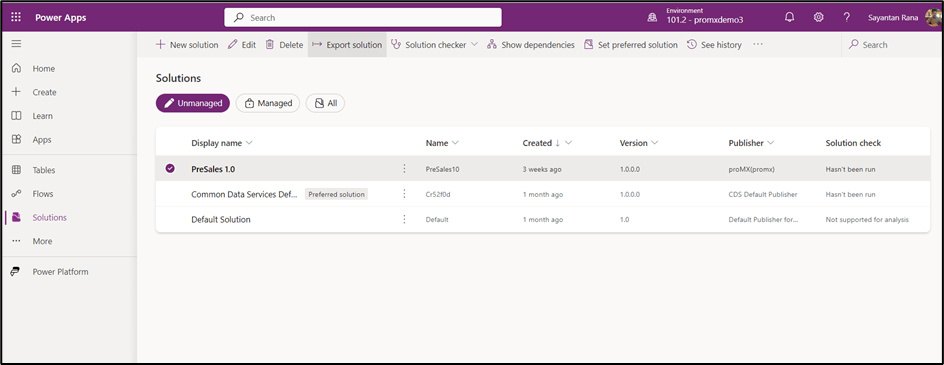
Step 1: Open the Power Apps Maker Portal.

Step 2: Select the desired environment.

Step 3: Navigate & Open the relevant Solution (where your Model-driven app is located).
Step 4: Access Model-Driven App’s Commands, Edit, and open in a new tab.

Step 5: Click on Settings.

Step 6: Go to Features.
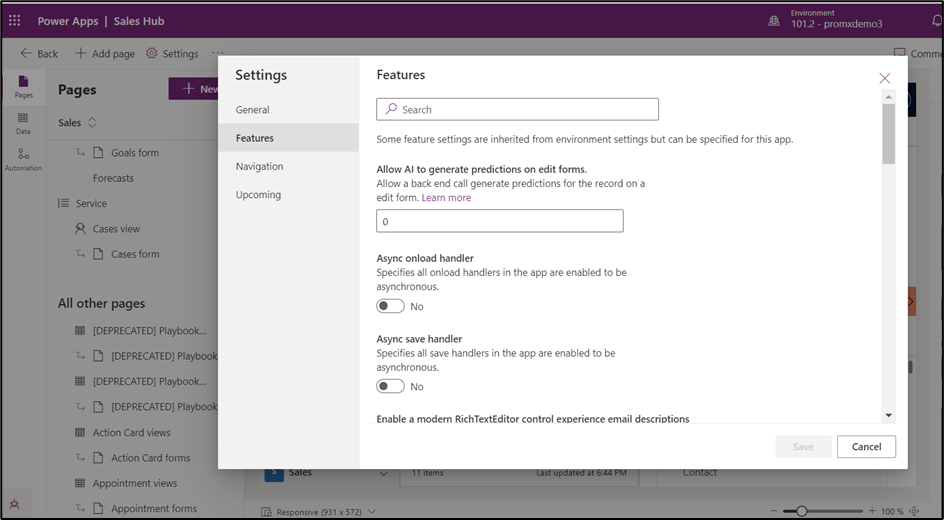
Step 7: Toggle “Enable Timeline Highlights” to Yes to enable the feature or No to hide it and click Save.

Step 8: Open the Model-driven App.

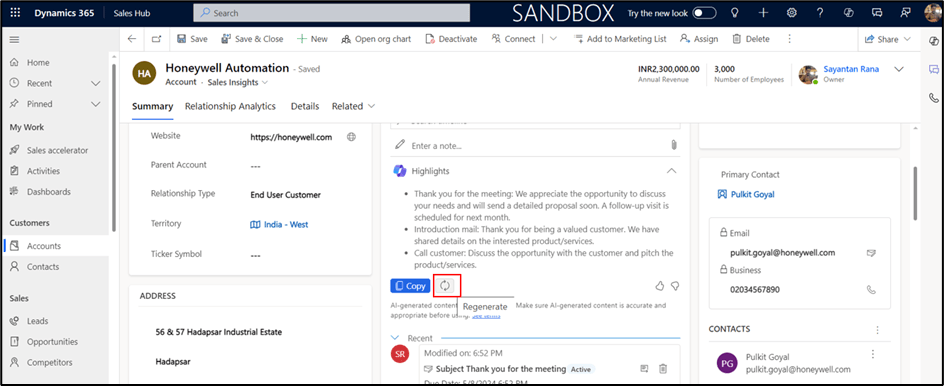
Step 9: Open any record in Account to see the Highlights feature.

Step 10: Click on Copy to copy the Highlights text.

Step 11: Use Regenerate to update the Highlights based on the latest activities.
#Conclusion:
With Timeline Highlights, accessing and understanding critical information has never been easier. Whether you’re managing customer interactions or analysing data, this feature empowers you to make informed decisions swiftly. Try it out today and streamline your workflow in Dynamics 365!
Thank you, Sayantan for your valuable inputs in this blog!
