

Introduction Earlier we used to book an appointment either by using Microsoft Teams or from MS Outlook. But now we can book an appointment from in-app appointments, also we can add links, lists and other rich text in description with new rich text editor control. These features are introduced by Microsoft in Microsoft 2022 release … Continue reading Join Teams meetings from in-app appointments
Project Task opening issue resolved by Microsoft in Dynamics 365 Project Operations
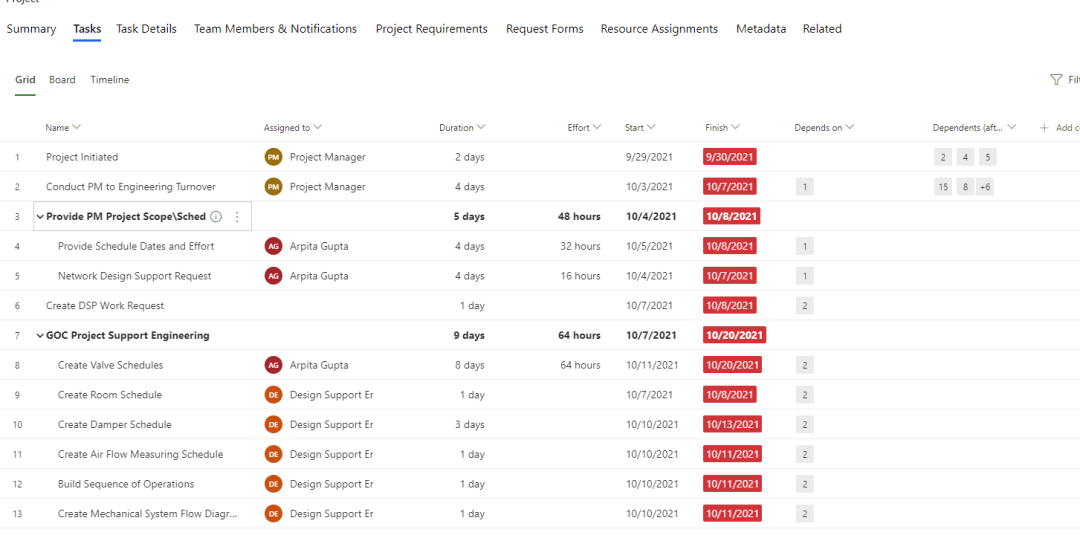
We often used to face issues while opening the Project Tasks in Project Operations (PO). We had to play a lot of tricks in order to open the schedule. Microsoft is consistently putting in efforts on making Project Operations, one of its successful tools to enrich it with tons of brilliant features and make it more user friendly. One of the major feature resolutions provided in the latest release provided by Microsoft was for opening the Project Tasks (Schedule) Seamlessly. Of course there are certain tweaks to be made in order to make it work in your browser. In this blog we will look at those tweaks and settings that would be needed to enable that feature.
Dynamics 365 PSA setup and user guide
This is the post excerpt.
Configure Opportunity Assessment with Risk and Importance Criteria in Sales Opportunity Agent
Problem Definition Sales teams often manage many opportunities at different stages of the sales cycle. Determining which opportunities need immediate attention and which are strategically important can be difficult when relying on manual reviews alone. Opportunities with limited engagement, missing stakeholder information, stalled progress, or external business challenges may go unnoticed until they impact deal … Continue reading Configure Opportunity Assessment with Risk and Importance Criteria in Sales Opportunity Agent
Import Projects in MPP Files into Existing Projects in Dynamics 365 Project Operations
Problem Definition Organizations frequently use Microsoft Project (.MPP) files for detailed project planning while using Dynamics 365 Project Operations for project execution and management. Previously, importing an MPP file always resulted in the creation of a new project. There was no option to import project schedules into an existing project. This limitation made it difficult … Continue reading Import Projects in MPP Files into Existing Projects in Dynamics 365 Project Operations
Turn Sales Data into Insights with Sales Research Agent
Problem Definition: Sales operations teams and business leaders need to regularly understand sales performance, pipeline health, revenue attainment, and progress toward business targets. However, the information required for this analysis can be spread across different systems and files. For example, opportunity and sales activity information may be available in Dynamics 365 Sales, while additional operational … Continue reading Turn Sales Data into Insights with Sales Research Agent
Get Quick Record Insights with Row Summary in Power Apps
Sometimes, it is important to quickly understand the key information about a record without having to navigate through multiple screens, tabs, or related records. AI-powered capabilities in Microsoft Power Platform are increasingly making these scenarios more intuitive and interactive. One such feature is Row Summary for model-driven apps. Row Summary provides a brief, AI-generated overview … Continue reading Get Quick Record Insights with Row Summary in Power Apps
Building a LinkedIn Assistant in Microsoft Copilot Studio using MCP servers
The idea started with a simple question: What if we could retrieve LinkedIn-related information without having to open LinkedIn every time? With that in mind, I started exploring how we could build a LinkedIn assistant using Microsoft Copilot Studio. The goal was to create an agent that could retrieve relevant LinkedIn information directly through a … Continue reading Building a LinkedIn Assistant in Microsoft Copilot Studio using MCP servers
Understanding the GitHub Copilot Harness in Copilot Studio
While exploring the new Copilot Studio experience, I kept seeing a new word again and again, "Harness". At first, I had no idea what it meant. I also noticed that every new agent I created was now running on something called the GitHub Copilot harness. So I wanted to understand what a harness actually is, … Continue reading Understanding the GitHub Copilot Harness in Copilot Studio
Configuring Time Entry Limits and Time Zone Behavior in Dynamics 365 Project
Problem Definition: Time entries are an important part of project management because they are used to record the time spent by resources on project activities. This information can later be used for project tracking, billing, cost calculation, and reporting. However, without appropriate validation, users may enter unrealistic amounts of time for a single day. For example, a user could accidentally record more hours than they worked, which can affect the accuracy of project data and subsequent reporting. Another challenge can occur when users in different time zones access the same time-entry data. When dates are displayed according to the viewer's time zone, the same entry may appear on a different date, which can cause confusion when reviewing or managing time entries. Therefore, administrators need a way to control the maximum amount of time that can be entered for a day and, where required, control how dates are displayed across different time zones. Solution: Dynamics 365 Project Operations provides Time Entry Configuration settings that allow administrators to control how time entries are validated and displayed. As part of the 2026 Release Wave 1, Project Operations introduces the ability to configure the maximum daily time entry duration. Administrators can define the maximum number of minutes that users are allowed to record in time entries for a single day. By default, the maximum duration is 24 hours (1,440 minutes). Administrators can reduce this limit to a value that better reflects their organization's working policies. For example, an organization may configure the maximum daily duration to 9 hours (540 minutes). The configured limit is checked whenever a time entry is created, or an existing time entry is modified. Project Operations also provides a setting to control the time zone behaviour of dates displayed in time-entry grids. Administrators can use either the default Time Zone Aware behaviour or configure the grid to use Time Zone Independent behaviour. Time Entry Configuration The Time Entry Configuration section contains settings that control how time entries are handled in Project Operations. The available configurations include: •Maximum daily time entry duration. •Preferred time zone behaviour on time entry grids. These settings can be accessed by a system administrator through the Project Operations settings. Steps to Access Time Entry Configuration 1.Sign in to Project Operations as a system administrator. 2.In the left navigation panel, change the area to Settings. 3.Under General, select Parameters. 4.Open the required Organization Unit. 5.Scroll down to the Time Entry Configuration section. Figure 1: Time Entry Configuration section in Project Operations Parameters. Configure Maximum Daily Time Entry Duration By default, Project Operations allows a maximum of 24 hours (1,440 minutes) to be recorded for a single day. Administrators can change this value and configure a more suitable limit based on the organization's working policies. For example, an organization with a standard working day of 9 hours could configure the maximum daily duration as: 9 hours × 60 minutes = 540 minutes The configured value is then used to validate time entries whenever a user creates a new entry or modifies an existing one. Hands-on Implementation To understand how the configuration works, I tested the maximum daily time-entry duration in a Project Operations environment. For the demonstration, the maximum daily duration was configured to 9 hours (540 minutes). Step 1: Configure the Maximum Duration … Continue reading Configuring Time Entry Limits and Time Zone Behavior in Dynamics 365 Project
Smarter Data Exploration in Dynamics 365 Sales: Natural Language Search with Smart
Problem Definition: Sales teams work with a large number of records every day, such as leads, opportunities, and accounts. As the amount of data grows, finding the right records quickly becomes more difficult. Although Dynamics 365 provides filtering and sorting options, users often need to apply multiple conditions manually, which can be time-consuming, especially for those who are not familiar with advanced filters. For example, if a salesperson wants to view open opportunities with an estimated revenue above a certain amount, they have to open the filter panel, select the appropriate columns, define condition, and then apply them. Repeating this process multiple times throughout the day affects productivity and interrupts the user’s workflow. There is a need for a faster and more intuitive way to search, filter, and organize business data without relying on complex filter configurations or extensive navigation. Solution: Dynamics 365 Sales now enables users to interact with Smart Grids using natural language through Copilot Search. Instead of manually configuring multiple filters, users can simply describe what they are looking for in everyday language. Copilot interprets the request, applies the appropriate filters, and immediately updates the Smart Grid. This significantly improves productivity by reducing the time required to locate business-critical information. What is Smart Grid? A Smart Grid is the enhanced tabular view used in Dynamics 365 Sales for displaying business records such as: •Leads •Opportunities •Accounts •Contacts With Release Wave 1 2026, Smart Grid becomes AI-enabled through Copilot, making data exploration faster and more intuitive. javascript:''javascript:''javascript:'' Thank you, Prathamesh Desai for your valuable insights for this blog.
Generating Smart Insights Using AI Prompts
Recently, we had a requirement in our project to calculate a matching score between Projects and Lessons Learnt. We have two tables: Project and Lessons Learnt. Based on the project description, we wanted to identify which Lesson Learnt was the most relevant, along with a matching score and a clear explanation of why it was considered a good match. After exploring different approaches, we found that AI Prompts in Microsoft Power Platform could help. By using an AI prompt, we can analyse the project description semantically, compare it with the lessons learnt, and generate both a relevance score and a justification for that score. Let's walk through the steps to create and use an AI prompt. Creating an AI Prompt: 1.Sign in to make.powerautomate.com. 2.From the left navigation pane, select AI Hub. 3.Select Prompts and click Build your own prompt. Note: If the Prompts option is not available in AI Hub, go to the Power Platform Admin Center and enable the AI Prompts feature for your environment. Configure the AI Prompt: javascript:''javascript:''javascript:'' writer.editor.GO_TO_TOP writer.editor.GO_TO_BOTTOM Thank you, Nisha Pawar for the valuable insights for this blog!
Rubric Evaluation in Microsoft Foundry: A Structured Approach to AI Model Assessment
Introduction In this blog, I’m going to introduce a powerful new capability in Microsoft Foundry called Rubric Evaluation. This feature enables developers and AI engineers to evaluate model outputs using structured, criteria-based scoring instead of relying only on simple pass/fail or similarity checks. Here’s a hands-on overview of how Rubric Evaluation works and why it’s becoming an essential part of AI development workflows. Public preview: Recently introduced in Microsoft Foundry (2026) General availability: Available since June 2026 Problem Statement As AI applications grow more advanced, evaluating their outputs has become increasingly complex. Traditional evaluation methods such as exact match checks, keyword comparison, or even basic semantic similarity often fall short when dealing with: •Subjective responses (e.g., explanations, summaries) •Multi-step reasoning outputs •Creative or open-ended answers •Context-aware conversational responses This creates a challenge: How do we evaluate AI responses in a consistent, structured, and human-like way while maintaining scalability and automation? Solution: Rubric Evaluation in Microsoft Foundry Microsoft Foundry introduces Rubric Evaluation, a structured evaluation approach where AI outputs are assessed against predefined criteria (rubrics) rather than simple correctness checks. A rubric defines what “good” looks like by breaking evaluation into multiple dimensions such as: •Accuracy •Completeness •Clarity •Relevance •Tone or style •Reasoning quality Instead of just saying “correct” or “incorrect,” the model is scored across these dimensions, providing richer insights into performance. Key Benefits of Rubric Evaluation 1. Structured evaluation: Breaks down responses into measurable criteria instead of binary outcomes. 2. Human-like assessment: Mimics how humans evaluate answers . 3. Better debugging: Helps identify why a response failed, not just that it failed. 4. Flexible and customizable: You can define rubrics tailored to your use case (chatbots, summarization, Q&A, etc.). 5. Works well with LLM-based evaluation: Rubric scoring can be performed using LLM evaluators for scalable automation. How Rubric Evaluation Works Step 1: Create an Evaluator 1. Go to the Microsoft foundry portal and then click on the evaluations section on the left side panel and then click on the Create evaluator button as shown in the below picture. 2. Once Create evaluator window opens, fill in the required details, including the evaluator name, display name, and description. Then, set the evaluator type to “Rubric”. 3. Next, select a suitable model from the available options. Choose the model that best matches your evaluation requirements and is supported for rubric-based evaluation. 4. Select the agent you want to use for the evaluation. In this example, I have two agents available, so I will choose the Leave Policy Agent. 5. After configuring the required settings, click Generate rubric to start creating the rubric based on the selected evaluator setup. javascript:''javascript:''javascript:'' writer.editor.GO_TO_TOP … Continue reading Rubric Evaluation in Microsoft Foundry: A Structured Approach to AI Model Assessment

