Problem Definition:
People tend to make their tasks automated rather than doing them manually. Working with CRM, we always need to work with solutions. Being a developer to satisfy customers’ requirements we always work on a development instance and import it to the production end once done with all implementations. All this is done by performing Export and Import manually from one environment to another. To reduce the tedious work of Exporting and Importing your work manually CI/CD helps in making the flow automatic.
What is CI/CD?

Continuous Integration/Continuous Deployment – The name itself is self-explanatory, commonly known as CI/CD pipeline. It works in the same way as the normal pipeline, transferring things from one part to another. This task helps you transfer your solutions from the development environment to the production environment effortlessly. Not only solutions but you can also transfer data stored in those solutions using this pipeline. You can also send patches as and when required using the CI/CD pipeline. The CI/CD process includes a series of steps /tasks which are performed to improve the SDLC process via automation.

Solution:
Steps to perform CI/CD Pipeline: –
Power DevOps Tool
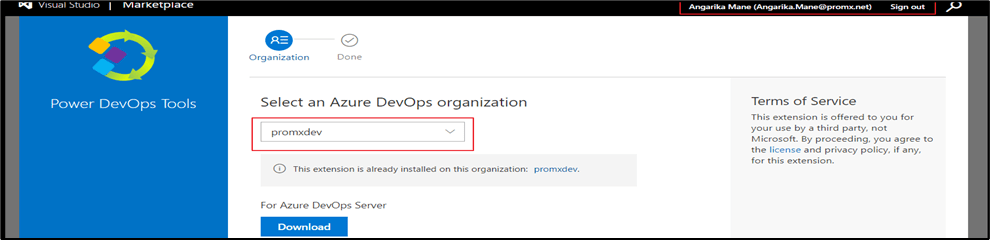
- Download Power DevOps Tool from Power DevOps Tools – Visual Studio Marketplace, so that you could include and implement all the tasks related to the power DevOps tool. These tasks would eventually help you in performing the CI/CD in a much more efficient way.
- Once you are done downloading the tool (as shown below), you must make sure that you are logged in with the same account as your Azure DevOps. After that choose your Azure DevOps organization in which you want to implement the pipeline. Click on Download and you are done with installing the DevOps in your respective organization.
Build Pipeline
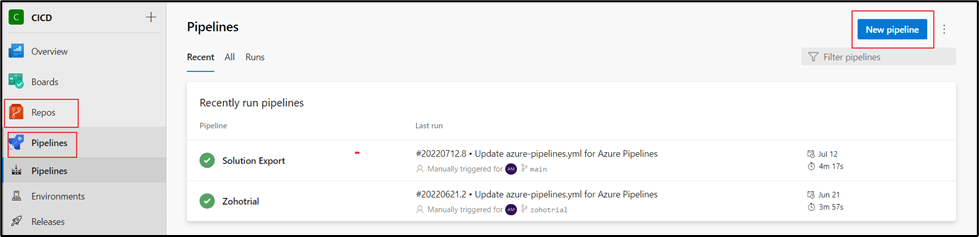
- Go to your Azure DevOps account à Click on the Pipelines tab in the left panel à Create New Pipeline.
- Here you will be provided with a list of options where your code is residing. For now, we will go with the Azure Repos Git option, which will be responsible for holding and managing all the files your pipeline will execute and export.
- In the next step, you will be asked to choose a repository (either existing or creating a new one) to which your pipeline will be connected.
- To create a new repository, go to the Repos tab from the left side panel à Create New Repos.
- After done with creation, choose the repository which you want to connect to your pipeline and then select the option through which you wish to configure your pipeline. As a beginner, we will choose the Starter Pipeline to customize the code.
- Once you click on the Starter Pipeline, abasic YAML code will be generated for you.
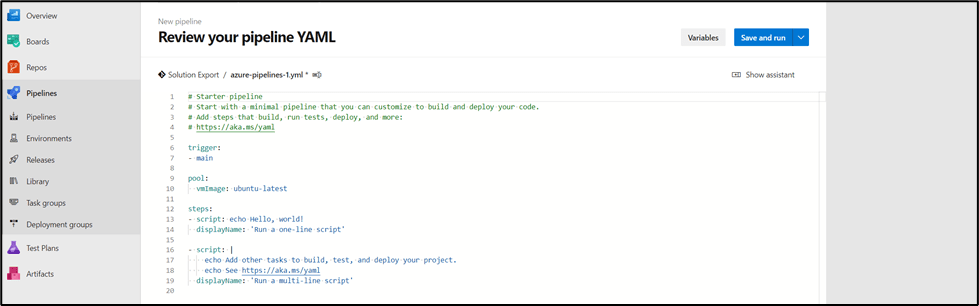
- Set the trigger to none or let it run on the default trigger set i.e., main.
- Also specify the pool on which platform you wish to run your pipeline.
- Remove all the default steps provided by the Starter Pipeline and add the following steps:
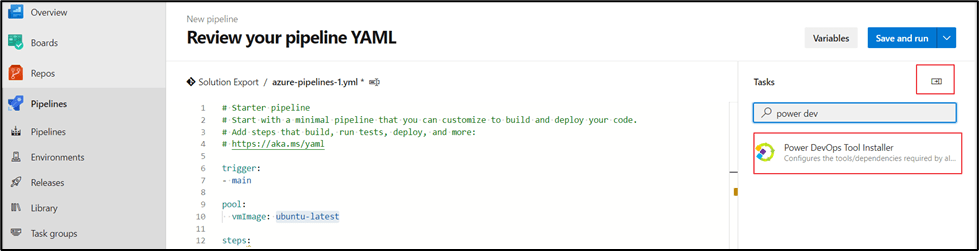
- Power DevOps Tool: Even though you have downloaded the tool to your organization, you need to define the tool each time you want to use the tasks related to the tool in each new pipeline. Add the task to your YAML code which will auto-generate the code for you with proper parameters.
- Ping Environment: This task is used to test the connectivity of your DevOps with the Power Apps. For this task, you will require a connection string that would hold all the information to connect to your CRM. To store all the credentials of your CRM, you need to create a custom variable that will contain all the credentials required.
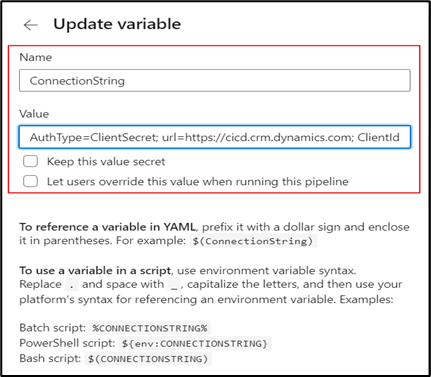
In the Values section, provide the correct AuthType and other required credentials related to the AuthType. For various AuthType refer to – https://docs.microsoft.com/en-us/power-apps/developer/data-platform/xrm-tooling/use-connection-strings-xrm-tooling-connect
Note: Office365 is a deprecated AuthType.
For getting the credentials such as ClientID, ClientSecret, etc., you need to register an app in the Azure Portal. Follow the steps mentioned in the below link:
- Publish Customization: Many times, we make changes in the CRM and forget to publish those customizations, so in such cases, CI/CD provides you with this task which publishes all the customizations (if left any) through the pipeline run itself.
- Set Version: This task is added to increment your build number of the solution’s version number after every run of your build pipeline, to showcase how many times the commits are made to the solution being imported.
- Export Solution: This task is responsible for exporting the solution from CRM which then creates a zip file for the same.
- Publish Artifact: This task is correlated with the above task, the zip file which is created in the above task is saved in the pipeline which is inbuilt in the DevOps itself.
Note: Use the Publish Pipeline Artifact task instead of using Publish Build Artifact, as it is deprecated.)
- Check Solution: This task works as a Solution Checker which is present in CRM. If any issues are found, then it doesn’t stop the running of the Build Pipeline, but it tells you the number of issues your Solution has and at what level the Issues are (i.e., High, Medium, Low).

- Unpack Solution: We all know that we don’t use zip files everywhere, so in such a case for extracting those zip files we make use of this task and store those extracted files in the Repos for future use.
For various predefined variables and default locations in DevOps refer to – Predefined variables – Azure Pipelines | Microsoft Docs
Release Pipeline
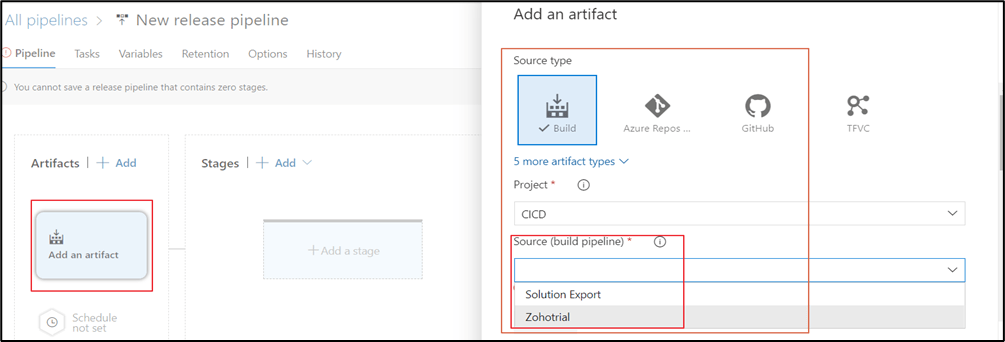
- Click on the Releases from the left side panel à Click on Create New Pipeline à you will be provided with a list of options to choose from, select Empty Job and name your Stage to showcase what the stage is performing. Also, name the Release Pipeline specific to the task.

- Add the Artifact that you have connected with the Build Pipeline in which you are exporting your desired Solution.
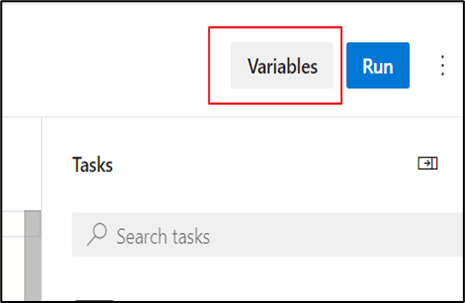
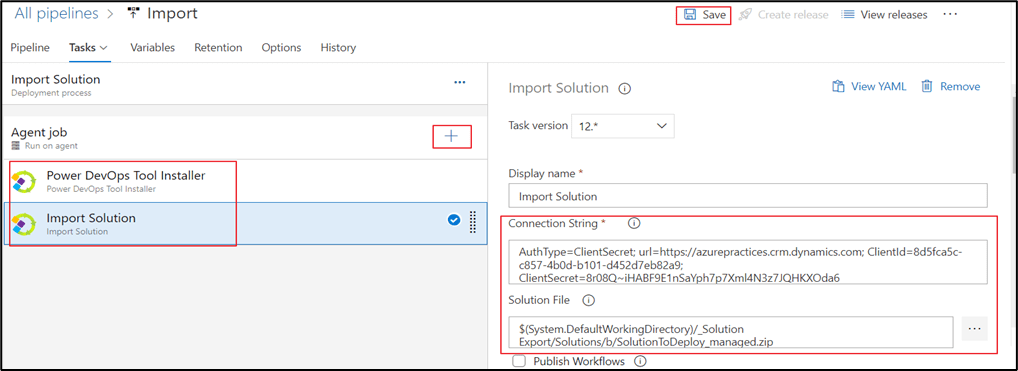
- Add the Power DevOps Tool task, to further you can add the tasks related to the tool.
- Then add the Import Solution task and mention the Target environment’s credentials in the Connection String parameter, to transfer the solution to the desired environment. Also, choose the file from the artifact which you wish to import. Then simply save your work and Create Release. This will import the solution to the specified Target CRM efficiently.
- You can also Schedule Triggers and provide Pre-deployment Approvals to restrict the Release in case of any discrepancy. We can also make the Release automated on the run of Build Pipeline, as per the requirement.

Conclusion:
Having an automated flow for each task is much more efficient than manually performing it. It also reduces the time complexity and avoids the physical efforts required to perform a particular task. These Power DevOps Tools tasks are great to help you for making the automated flow for Export and Import purposes using the CI/CD Pipeline. There are also many other tools to perform these tasks in DevOps. If you know you can make use of one of them. I found this tool’s tasks very effective and easy to implement. Thank You!
Thanks Angarika Mane!

Very confusing for person like me who is learning CI CD process
LikeLike
Thank you, for your inspiring comments 🙂
LikeLike