Hello everyone, and welcome to the blog, In this blog, we are going to create a simple yet effective chatbot by using Generative AI by just providing the Website URL or a document with some information related to a Topic.
Prerequisite:
Login to Microsoft CoPilot Studio and sign in or sign up for a free Microsoft Copilot Studio instance.
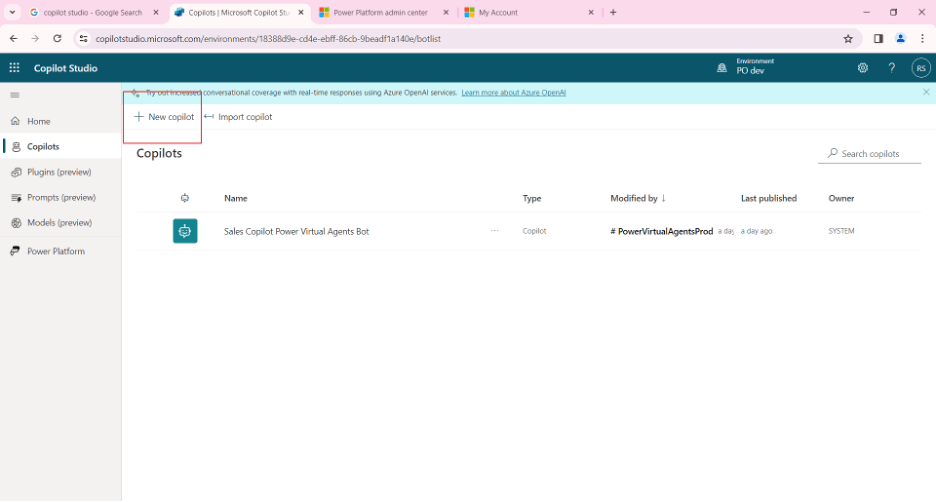
Let’s Start by creating a new CoPilot as shown below:
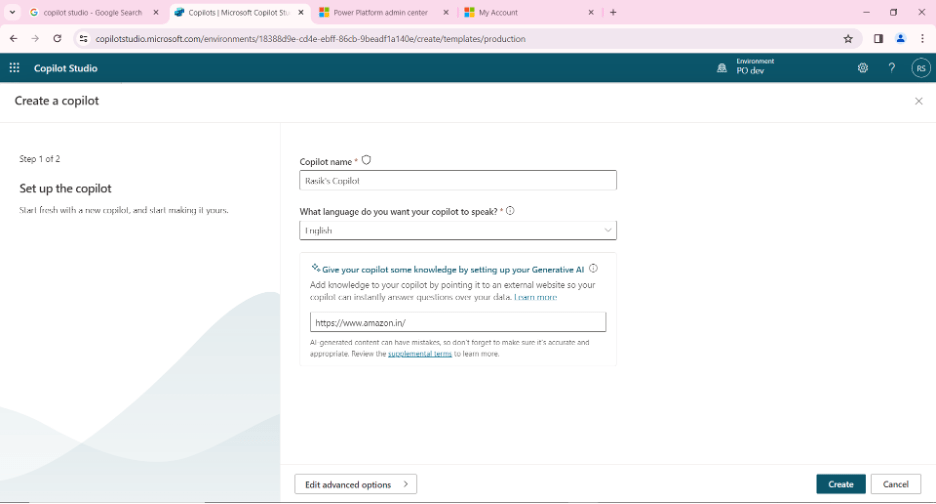
Following this step, you will be able to configure the CoPilot Name and the language that you would like Copilot to speak. There are several languages available for selection. I’ll be sticking to English for the time being.

You can see that there is a dialog box to enter the website URL that you want to use to generate the generative answers in the screenshot above. I’ve entered the Amazon URL for the time being.
After completing the required fields, click Create to start a new CoPilot. And allow time for the CoPilot to be built. After giving some time to build Microsoft copilot you will get you Chatbot as shown in the screenshot below

I’ve now included a website URL so you can get the response. So let us try posing a relevant question.

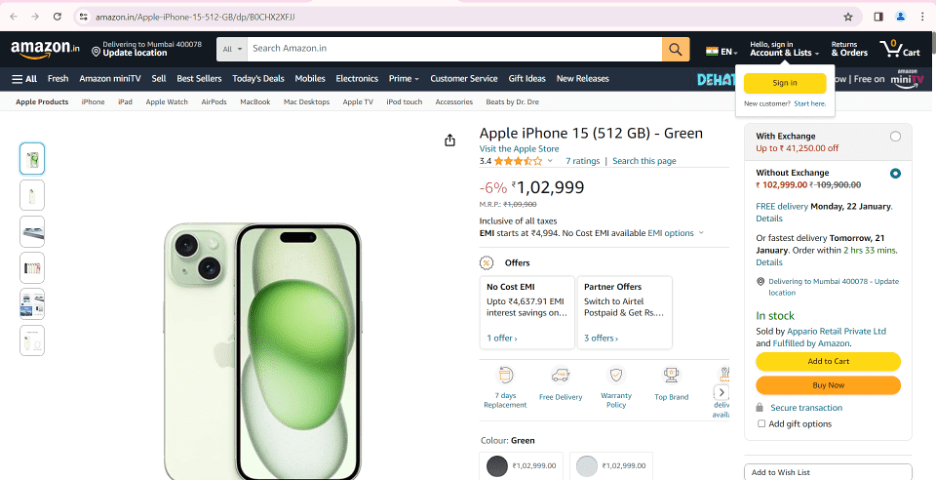
As you can see in the screenshot above, I asked a question regarding the price of the iPhone 15, and it produced an answer based on the reference link I gave. As you can see, it provides the appropriate link for you to purchase the item. Let’s click the link to view the outcome. The same is shown in the screenshot below.
Here’s how to enhance the intelligence and effectiveness of your chatbot and apply it to business solutions to utilize your customer experience in a low-code, no-code manner.
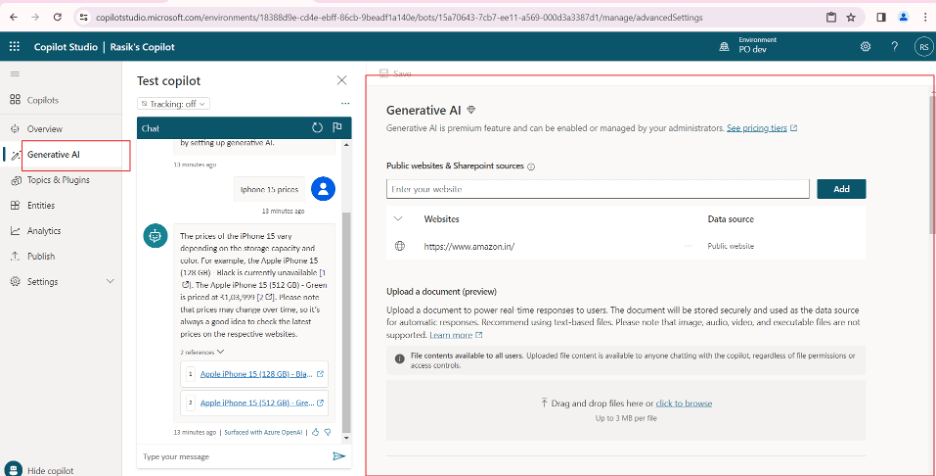
Additionally, you can increase the number of website URLs that your chatbot cites. Navigate toward the Generative AI Tab, as indicated in the screenshot below, to add more website URLs.

The Generative AI Tab overview is displayed in the screenshot below. You can add more website URLs in the places on the right that are highlighted. in order for your chatbot to respond to additional inquiries.
You can also see that you may give your bot document references to generate extra answers in the highlighted section above. Let’s explore how we may upload a document and provide our bot with extra data. As seen in the screenshot below, I have a Word document with information about Shekaru, an Indian giant squirrel. The chatbot won’t be able to provide you with information about it if we ask it before uploading the documents. An example of this can be seen in the screenshot below.
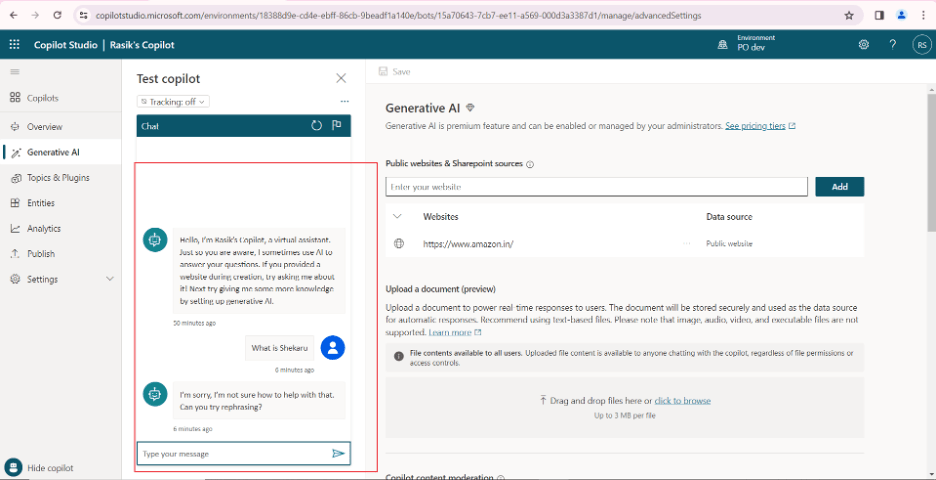
Fig. 1: Because we haven’t given the chatbot any information about Shekaru, it is unable to comprehend the inquiry.
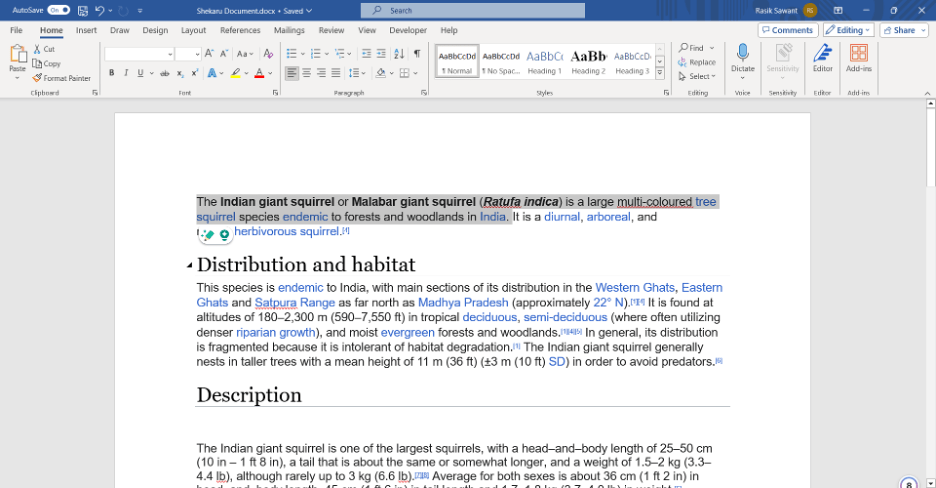
Fig. 2: A document with Shekaru-related information.
Note: (This information I have taken from Wikipedia the link for the same Click here)
We will now upload this document as it appears in the screenshot below.
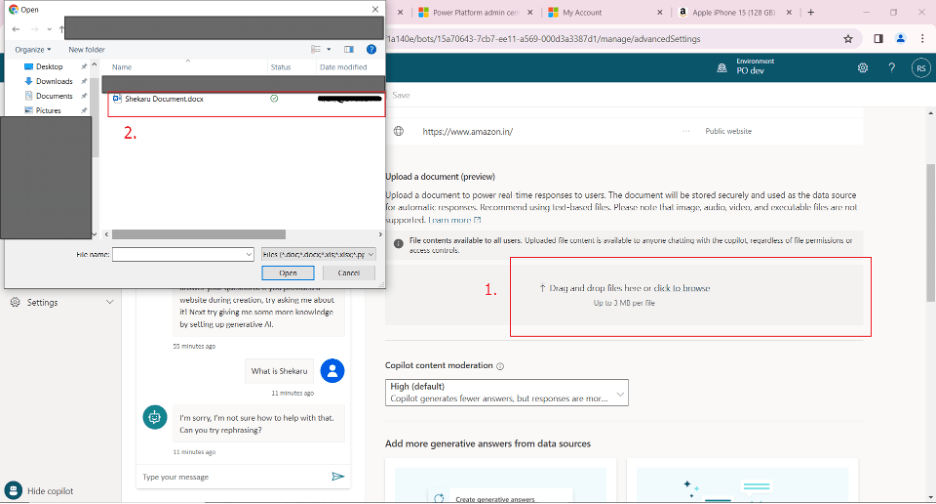
As seen in the screenshot below, once the document has been uploaded, it will appear in the Upload Document Section.

And now that we’ve uploaded the document with Shekaru-related information, we’ll be asking the chatbot questions about Shekaru. We would rephrase the query that the chatbot was unable to respond to the first time.
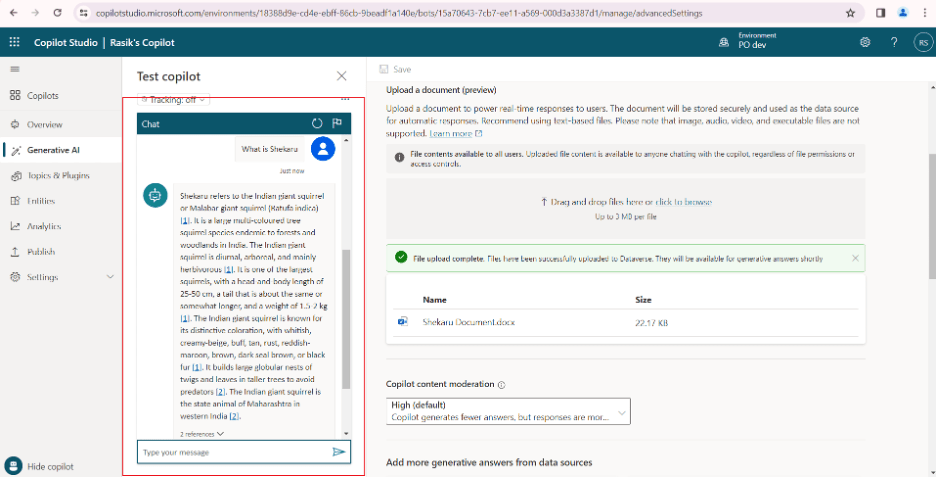
As we ask the same question, “What is Shekaru?” we can see that in the screenshot above. It is capable of providing answers and summaries for the data from the uploaded documents.
For the blog, that was all. I sincerely hope you enjoy this blog. If you do, kindly let me know, and feel free to leave a comment with any recommendations.
Thank you, Rasik for your valuable insights!

Useful Insights. Thanks for sharing
https://colaninfotech.com/artificial-intelligence-services/
LikeLike