
The idea started with a simple question: What if we could retrieve LinkedIn-related information without having to open LinkedIn every time?
With that in mind, I started exploring how we could build a LinkedIn assistant using Microsoft Copilot Studio. The goal was to create an agent that could retrieve relevant LinkedIn information directly through a conversational interface, making the process faster and easier for users.
Let’s see how we can achieve it. So in this blog, I’ll show you how to find the available LinkedIn MCP server. We’ll set it up locally. Then I’ll test that MCP server locally to make sure it’s working. After that, I’ll generate a local service URL to a public URL using Dev Tunnel tool. Finally, we will connect this MCP server to Copilot Studio and we’ll test all the functionality directly from the Copilot Studio interface.
Now, in order to perform all the steps, first we have to download the MCP server project from GitHub. You just need to simply type ‘linkedin mcp server’ on Google, and we should be able to find an open source project available on GitHub.
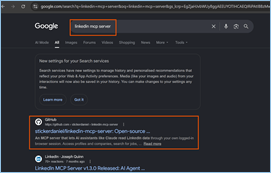
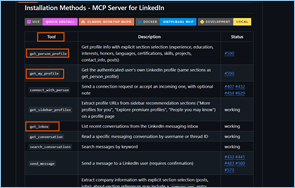
Let’s select this GitHub repository and check all the details. Here we will get the GitHub repository and the complete project. Once you scroll down, we will be able to see all its related tools we can perform, like get person profile, get my profile, get inbox. There are many other tools available that we can execute from our agent.
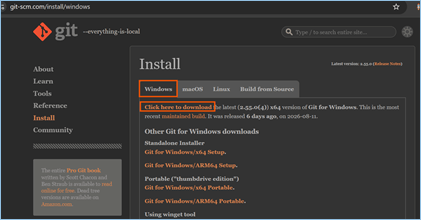
Now, after scrolling down, we will be able to see some steps that will help to set up this locally. Now, as per our requirement, we just wanted to set it up locally. Here are the steps that we need to perform. There are some installations that need to be done before moving forward. So let’s just go to Git and download it for Windows. Download the EXE file and perform all required steps.
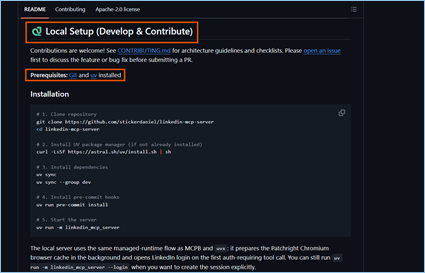
Then go to the uv. Here there is no installation file available, but we have a PowerShell command. We can directly use it in PowerShell to install it on our local machine. So let’s just copy and open PowerShell in admin mode. And then just paste that copied command on PowerShell. Enter it.
In a minute, it will download UV on our local machine. Here we can see the installation is done.

Now again, go to GitHub documentation, and here we can see there are some installation steps available to get this project on our local machine. Just copy as is and paste on PowerShell and press Enter.
So this is currently processing all the required steps to get it on our local machine. It will clone that repository, then install some dependencies, and then start the server.
So here it is asking for transport mode. As per our requirement, we are going to perform this MCP server on a browser level. So I’ll just go with the second option, Streamable HTTP. Use the down arrow on the keyboard to select it and press enter.
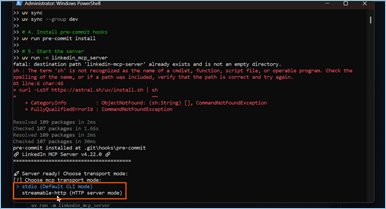
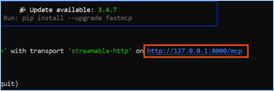
Now you will be able to see the localhost URL generated by this service.
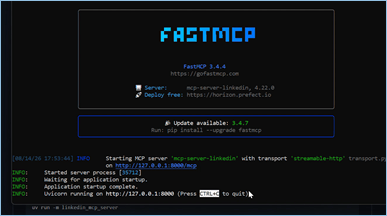
Now, first we have to connect our LinkedIn account with this server. So I’ll just use this quit option and press CTRL + C to quit this. Now there is one more command available to log in with our LinkedIn account. Here it is.
uv run -m linkedin_mcp_server –login
Just copy it and paste it as is on PowerShell. In a moment, it will open a new window where we have to provide our account details. Now I’ll just go and sign in with my account. Give the username and password which are associated with our LinkedIn account. The window will get auto-closed once the account is open. I can see my account. The window will get auto-closed, and we can see over here the profile is saved.
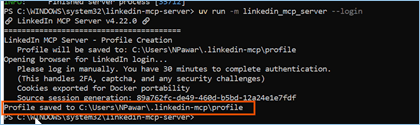
So our LinkedIn account is now synced or linked with the MCP server. Now you just have to rerun our MCP server using this command, copy it and paste it in PowerShell.
uv run -m linkedin_mcp_server
It will again ask for transport mode. Again, we have to select Streamable HTTP, and here we go. We have our localhost URL, but currently, we have to test it. So there is one more tool available, MCP Inspector, which can be used to test this MCP server on our local machine. So I have a command stored in my notepad.
npx @modelcontextprotocol/inspector
First I’ll open a new PowerShell window with administrator mode (keep the existing one running), and we’ll copy the command to open that Inspector and paste it.
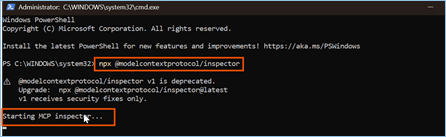
So this command will help us to open Inspector in the new browser. So as you can see the MCP Inspector window is open on the browser.
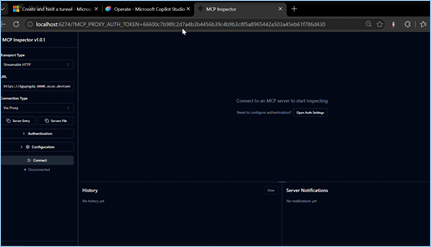
We just have to replace with our URL, the localhost URL. Just copy it and paste it as is on the URL input field. And keep other fields like transport type and connection type as is, and then click on the Connect button.
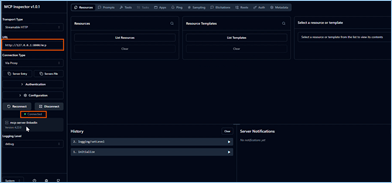
So now we are able to establish our connection with the MCP server. Here you can go on the Tools. There are tools, meaning events and actions available. We can use any of them. For now, I’m just using Get My Profile and just click on the Run Tool button over there to check whether it is working or not.
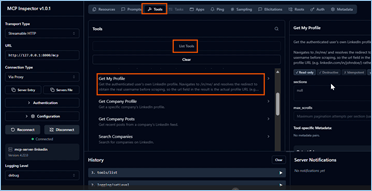
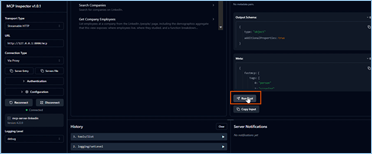
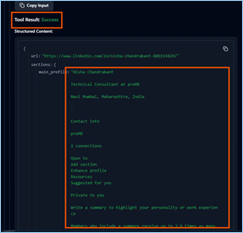
After a few seconds, it will show us the output that is returned from the server. Now we can see the test result is success, and I can see my profile, my name, my current designation, my current company, my current location. Everything I can see over here. This means we are able to run this MCP server locally and can execute some tools as well.
As this is a local URL, we have to convert it publicly. We will just quit all opened PowerShell sessions (using Ctrl + C command). And again open a new PowerShell window to convert this local URL into a public URL. We have one Dev Tunnel tool available which will help us to convert local URL to public URL. So let’s go to the Dev Tunnel site where we can see there are some steps available to install it and run it. I’ll just copy this command and paste in PowerShell as is.
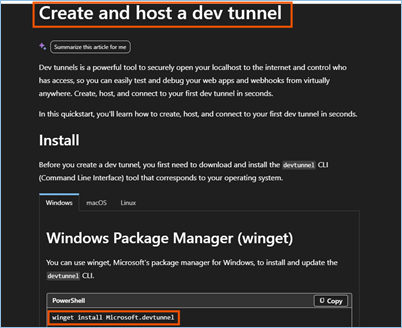
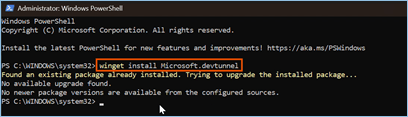
As I have already installed it, it will try to update the Dev Tunnel, but there is no update available. It is showing this message.
Now, we need to log in to Dev Tunnel using an authenticated account. I’ll sign in with my Windows account to authenticate the Dev Tunnel. Once that’s done, I’ll run one more command to expose the local URL as a public URL.
So before that, first I’ll rerun the server. Select the transport mode. And keep that session open. Now use below commands to login.
devtunnel user login
I’ll just use below command which needs to convert the url.
devtunnel host -p 8000 –allow-anonymous
Here we just have to change the port number, which is mentioned over here, showing in this MCP server running screen.
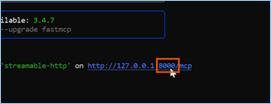
We can see there is a URL available, the second one, which is required for connecting MCP server from Copilot.
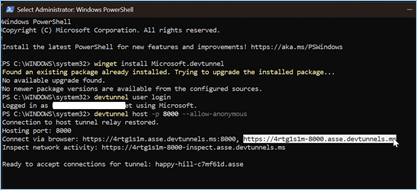
But before that, I’ll just test this again from Inspector. So here I’m reopening MCP Inspector and then just replacing the local URL with the public URL. I’ll just append /MCP to the URL, and then we’ll try to connect it.
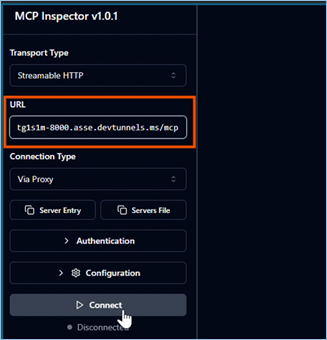
Our connection is established. And now if we go on the list tools, let’s just take any functions available from here. Let’s say get inbox, and then we’ll try to run the tool. It will take a moment to give us response.
Now we can see the messages are shown on the screen.
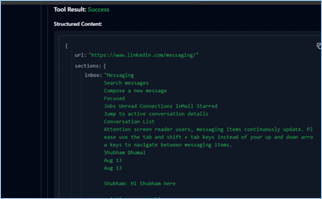
Now we are confirmed that our public URL is working. So now let’s go to Copilot Studio and create a new agent. I’ll give the name as LinkedIn Assistant, and I have already copied my instruction, a ready instruction for this agent, so I’ll just copy and paste over here.
Here we have tools available. I’ll just select the tool. In the MCP server there is no default server available. I’ll just create a new custom one. I’ll give a server name. Any name we can give over here. Then we have to give a description as well. And I’ll just paste the URL which is available on MCP Inspector. So let’s go on the MCP Inspector again and copy the URL and paste in the server URL and add it. Currently, we do not have any authentication method, so I’ll keep as default and add it.
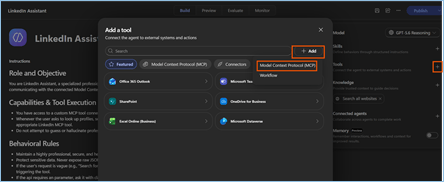
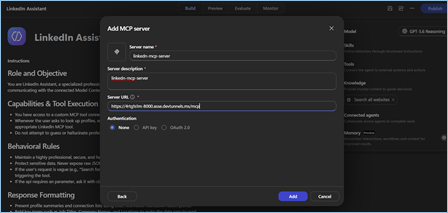
After that, it will ask us to create a connector for it. Just click on the dropdown and create a new connector and give some name for the connector and save it.
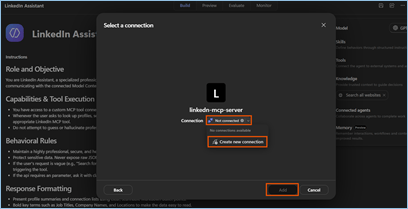
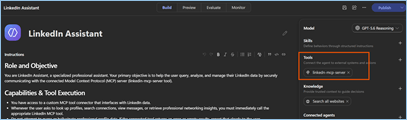
So, we’re all set with the agent creation. Now, let’s test whether everything is working as expected. We’ll go to the Preview screen and try a few prompts,
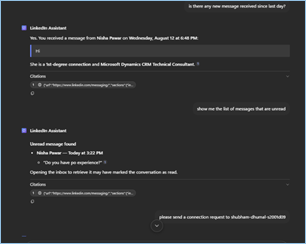
As we can see, the agent is returning the expected results. This way we can integrate any service through an MCP Server in Copilot Studio and leverage it to support a wide range of use cases.
Thank you, Nisha Pawar for your valuable insights to this blog.


